Why did I leave Linux Desktop
In January 2019 I prepared myself for the big jump as a freelancer and one of the first questions was “Which laptop should I buy for my activity ?”, as I’d need one of my own.
My list of requirements placed the bar a bit high :
- nice battery life (over 8h under IntelliJ)
- good amount of RAM ;
- have an NVidia GPU for CUDA usage ;
- stylus friendly (to be actually able to draw things and take note on it) ;
- Under 2.5 kilograms ;
- Linux-compatible.
If you do not know, finding a laptop fully working with Linux is hard, especially when most powerful laptops have a discrete NVidia GPU alongside the Intel one (hybrid graphics called Optimus). In most cases, Optimus is badly supported and either keeps the discrete GPU on, eating your battery, or makes it complicated to use it because of having to reload X server to switch to it.
Having a hard time finding the right workstation, I asked myself if I really wanted to limit myself to Linux. One option was Mac OS X, but there’s no stylus-friendly laptop and I’ve got kind of a bad feeling with it UX wise, so that one’s out. The other option was Windows, and Microsoft announced WSL years ago as well as Windows Terminal in the works.
All those moves from Microsoft appealed to my curiosity, so I wanted to see for myself what all of this is about : I ended up taking something from the Surface line, the Surface Book 2.
Windows Subsystem for Linux
The genesis
Windows Subsystem for Linux (WSL), in its first version, is a translation layer, a bit like Cygwin but smarter and without binary re-linkage needed. This means that, in theory, any native ELF64 binary does run in WSL, without any modification !
In truth, though, it does not emulate advanced system call or kernel feature, like those needed for Docker (cgroups, namespaces, …). This didn’t hamper me much, but being an emulation layer, although CPU performance was good, I/O were slow, like, really slow. This made WSL1 not that usable with Python, Scala or JavaScript projects in the end, being pretty heavy on I/Os.
If you’re curious about how WSL1 works under the hood, you can check out one of the official blog posts about it at Microsoft or the nice explanation from Jessie Frazzele.
WSL2, 100% better
After that, on May 2019, Microsoft announced they were working on a 2nd iteration of WSL, which would use a lightweight VM tightly integrated with Windows and would be soon available to Insiders community.
I’ve switched to it as soon as it got on the Insiders channels, as I/O performance was announced to be way better, which it was, and made it actually possible to use it for development purpose, or, well, use it like any native Linux !
Now, since May 2020, it’s available natively in the May 2020 Update of Windows 10.
Installing WSL
As WSL currently still defaults to WSL1 for compatibility reasons, you’ll have to install WSL and, after installing necessary features for virtualization, set the default version of WSL to 2 if you want to use it.
Whichever you choose, the distribution setup stays the same. Let’s see then for WSL 2 !
First, open a Powershell as Admin and run this to enable WSL :
dism.exe /online /enable-feature /featurename:Microsoft-Windows-Subsystem-Linux /all /norestart
Then, if you want WSL2, run also this to enable Hyper-V for virtualization support:
dism.exe /online /enable-feature /featurename:VirtualMachinePlatform /all /norestart
Now, reboot, and if you chose WSL2, open back a Powershell as Admin and run the following to change WSL default version
wsl --set-default-version 2
You are now ready to install a Linux distribution.
Installing a distro
Microsoft and editors done a pretty nice job at packaging distributions : you’ve got on the store Ubuntu, Kali, Debian, Alpine, OpenSUSE… which are all one click away ! Just search for WSL in the store, install one, run it from the start menu then you’re greeted with an invite asking the username and password you’d like, then it’s ready to go.
In order to get a better shell experience, first, search for Windows Terminal from the store and install it, you’ll get near-Linux-like terminal emulator experience :).
Now, let’s try installing one, for example Debian. Search for it on the Store, hit Install, then once it’s ready, open your new Windows Terminal and run:
nekon@ASANA $ debian
Installing, this may take a few minutes...
Please create a default UNIX user account. The username does not need to match your Windows username.
For more information visit: https://aka.ms/wslusers
Enter new UNIX username:
You’re greeted with an invite asking you for a chosen username, then a password, aaaand:

Now, you may do whatever you want inside your new environment, as if it was a fresh Linux install, minus the desktop environment, as you’ve got Windows' one already.
Getting in-and-out of WSL
First, check the + sign near the shell tab of Windows Terminal and see for yourself :
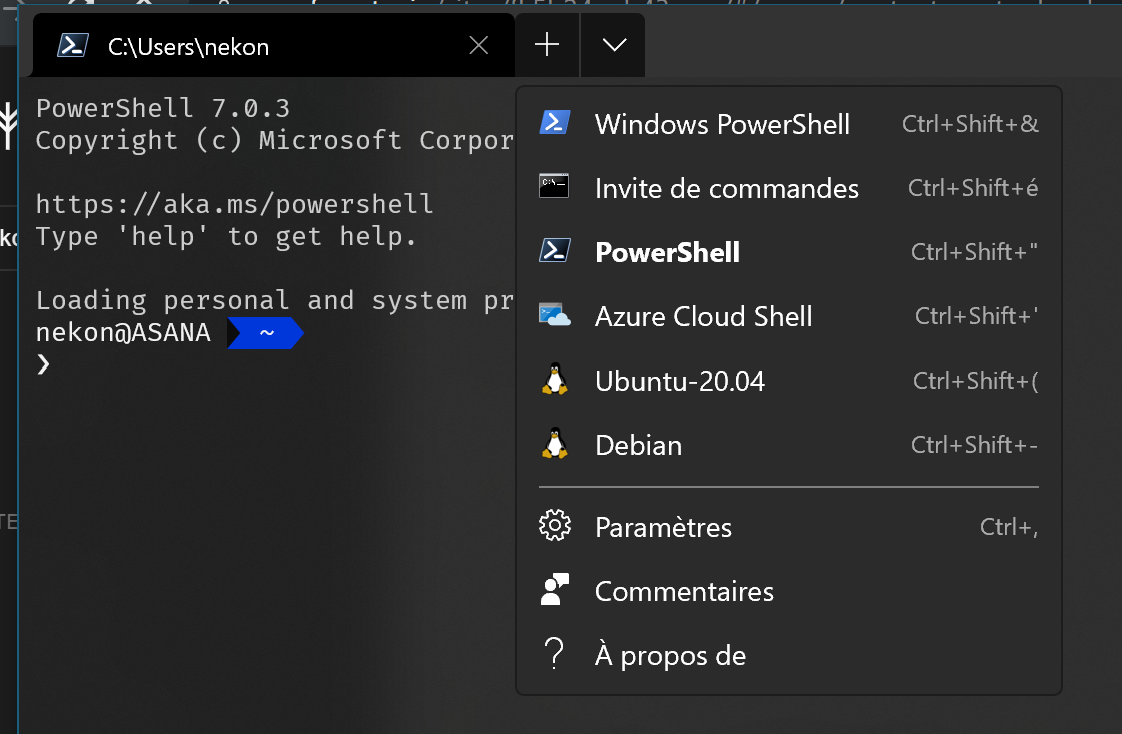
You can start any of your distributions from there, which get you right in the chosen one, or you can do the following in a PowerShell session :
$ wsl -l -v
NAME STATE VERSION
* Ubuntu-20.04 Running 2
Debian Stopped 2
$ wsl -d Debian
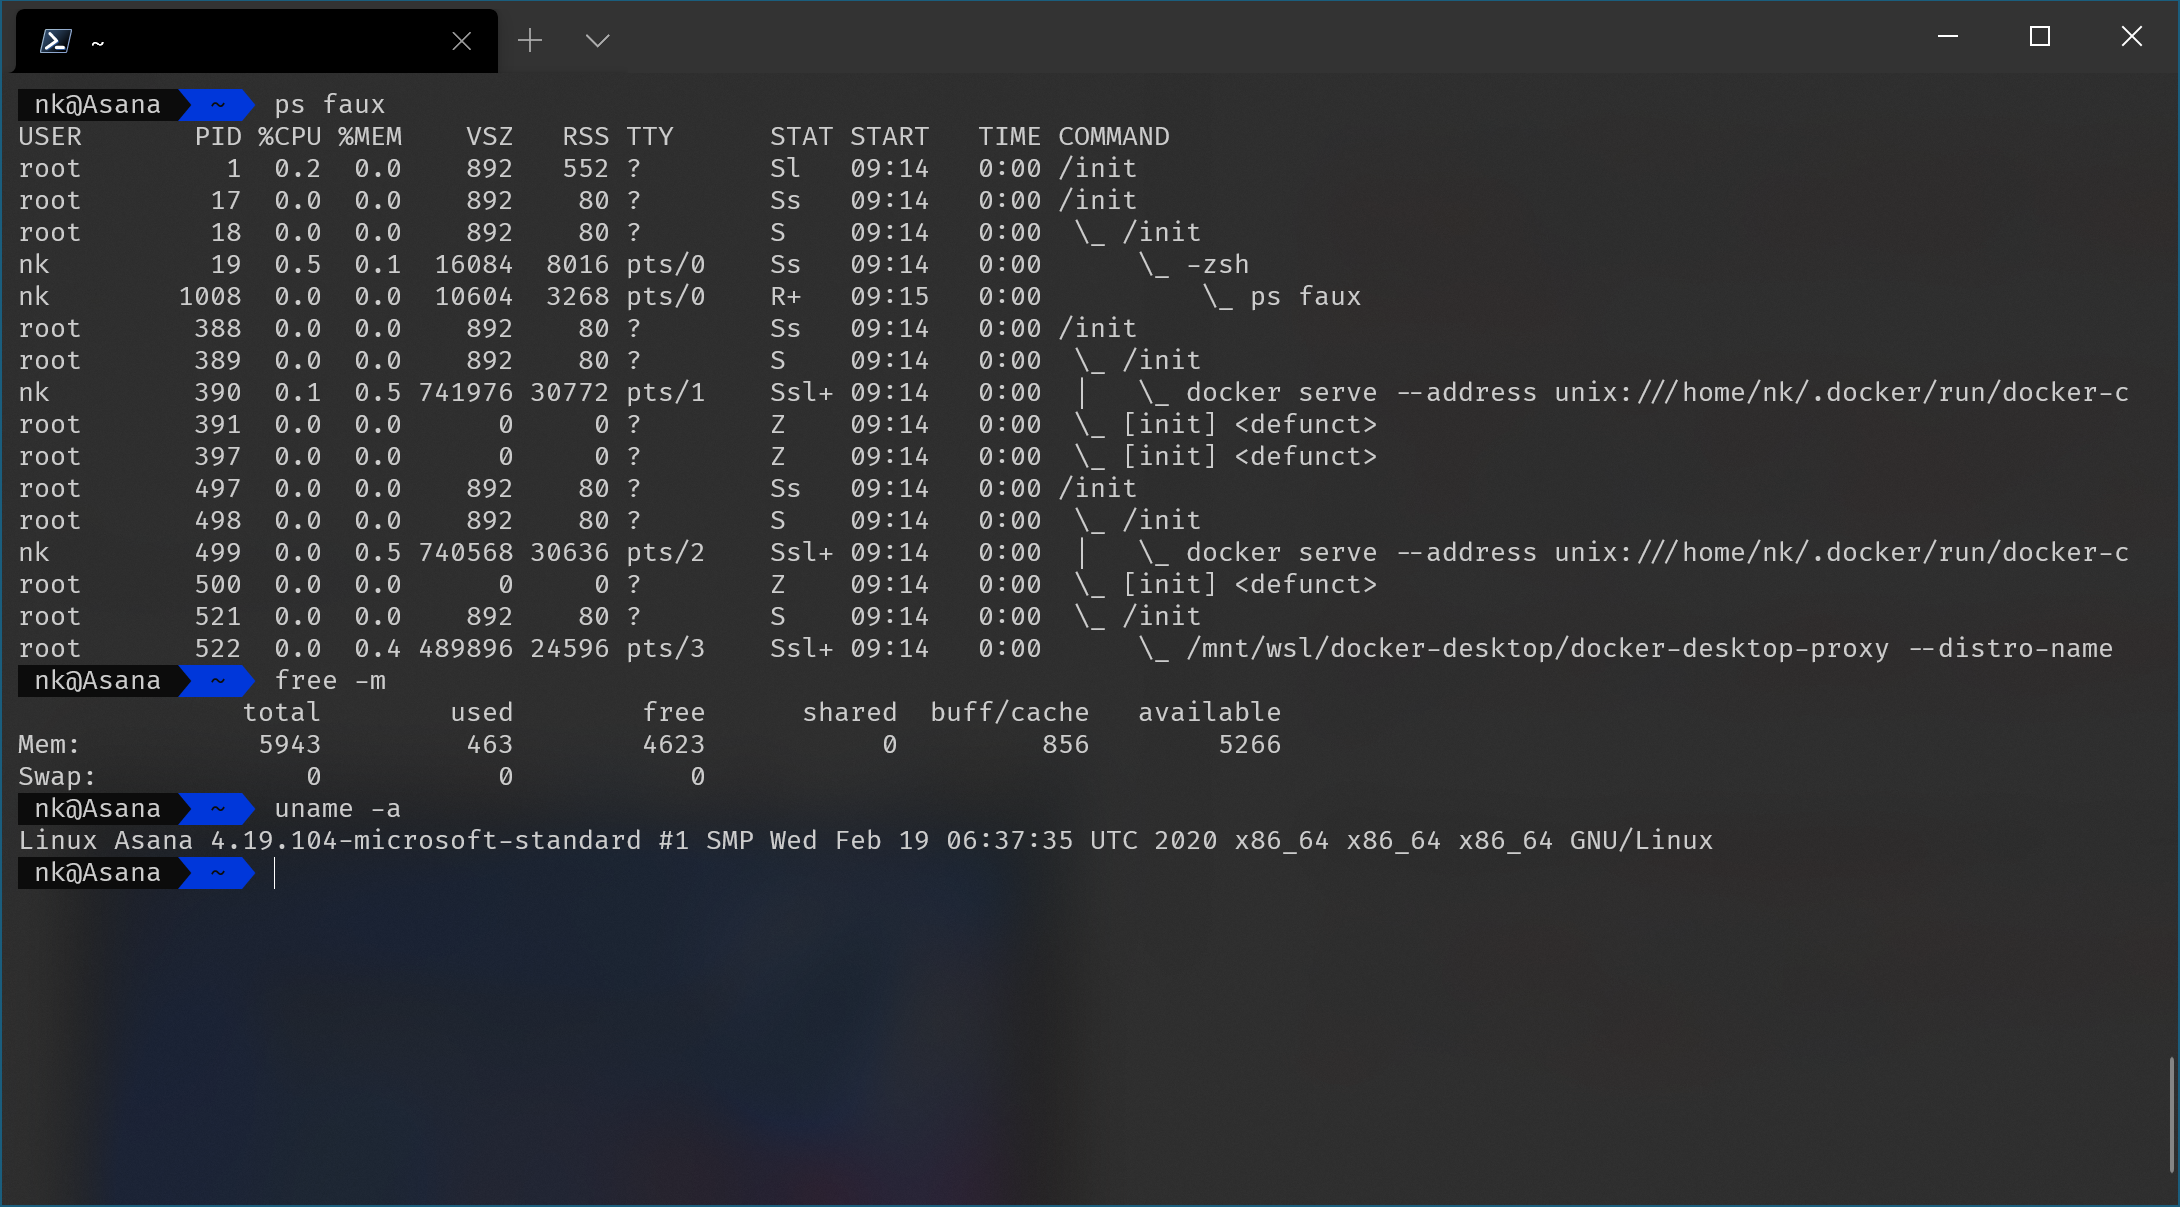
nk@Asana:/mnt/c/Users/nekon$
Your disks are also available, as you can see when entering WSL, under /mnt, which allows you to freely access files from Windows under Linux.
Wrapping up
Using WSL allowed me in the end to check all my requirements, while still having a Linux environment available on-demand and not too heavy on resources, hence why I’m staying currently with this setup. I’m also able to use the NVidia GPU for ML tasks also in WSL without killing my battery.
I won’t say Windows doesn’t have quirks, but so far, I’m fine with it being my daily driver since January 2019.